
PayPal Button
PayPal Button is a JavaScript library from Datatrans that facilitates the setup, rendering, and usage of PayPal buttons (PayPal, PayPal Pay Later). It acts as a wrapper of both the Datatrans PayPal integration and the PayPal JS SDK and implements all required operations for checkout with PayPal directly from the merchant checkout page.
  |   |   |   |
Process overview
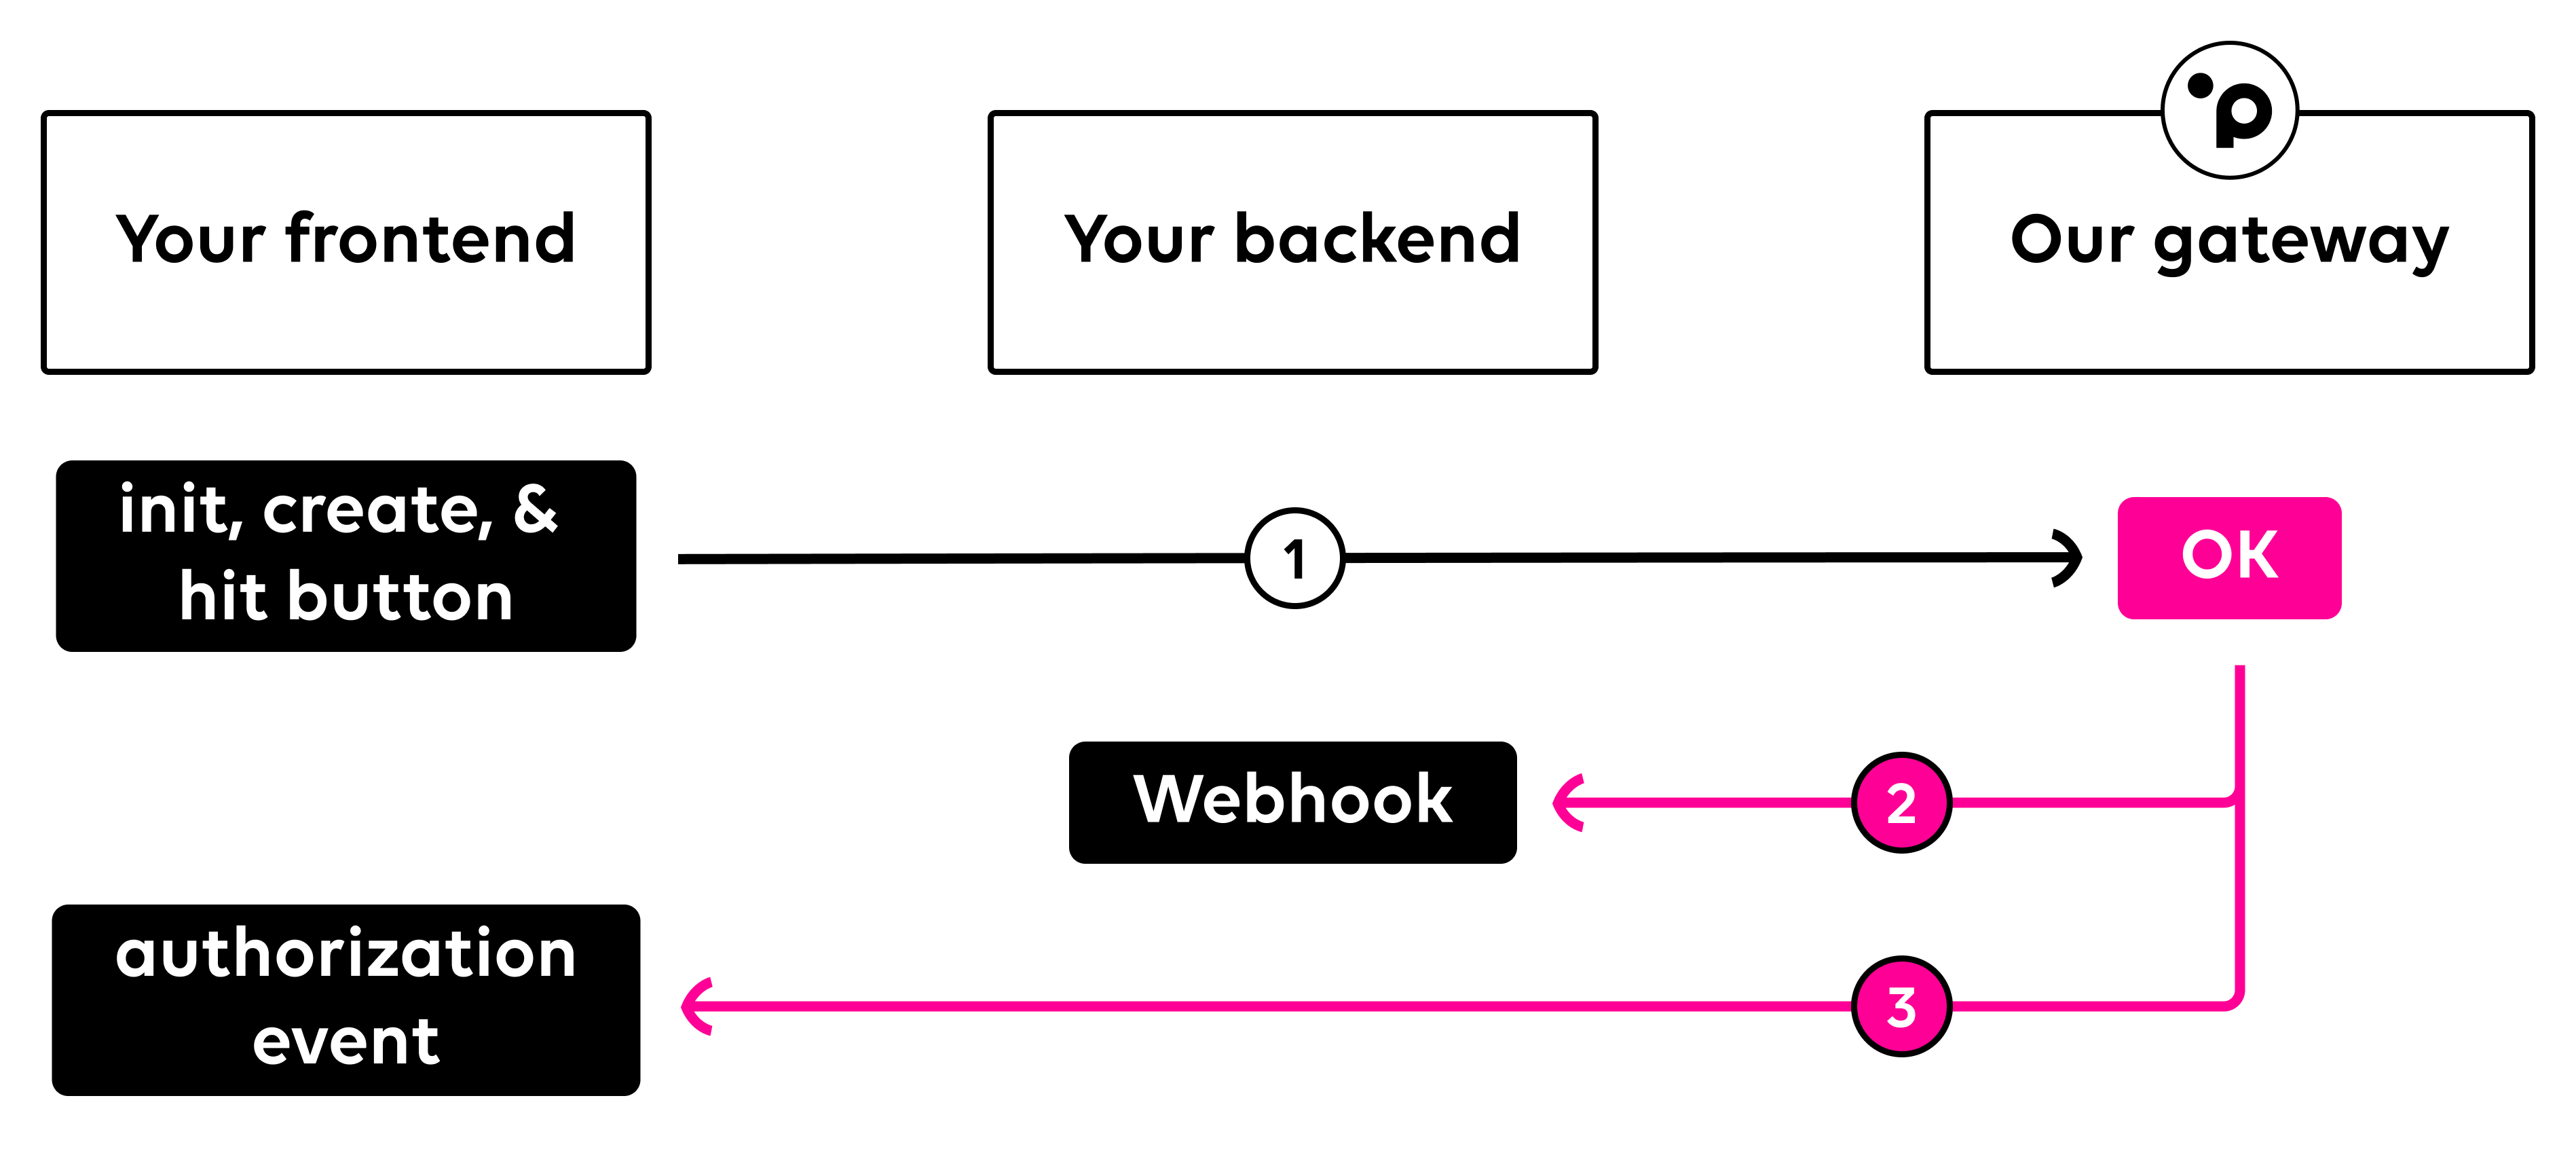
To start a transaction via our Payment Button Integration, you will need to initialize the Payment Button Javascript library and wait for your customer to hit the button provided by the library ¹. We will call your webhook once the transaction has been completed ² and inform your front end again once a transaction has been finalized ³.
PayPal Button integration
To get started, include our PayPal Button script on your web page.
<script src="https://pay.sandbox.datatrans.com/upp/payment/js/paypal-button-1.0.0.js" type="text/javascript"></script>Next, you'll want to initialize the PayPal button. Within PayPalButton.init(), you define various options for script initialization, including the merchantId, the currency, the amount, the settlement option, the option to enable PayPal Pay Later, and whether you want to save a PayPal wallet as a token or not.
You also need to configure various button options, such as the layout, color, shape, and label of your PayPal button. The full list of the available button options is documented here. Make sure to change the refno to a unique value for each transaction.
PayPalButton.init({
  merchantId: '{merchantId}',
  currencyCode: 'CHF',
  amount: '100',
  autoSettle: false,
  createAlias: false,
  reqType: 'CAA'
});

const configuration = {
 paypaloptions: {
   button: {
    layout: 'vertical',
    color: 'blue',
    shape: 'rect',
    label: 'paypal'
   }
  },
  transaction: {
   refno: {{reference}},
   authenticationOnly: false,
   returnAddress: true
  }
}
Placing the PayPal Button
Handle the creation of the PayPal button by passing a HTML object and your previously defined configuration.
PayPalButton.on("init", function () {
  PayPalButton.create(document.getElementById('paypalbutton'), configuration)
});
Success
Listen for the authorization event of the PayPalButton.on() call.
PayPalButton.on("authorization", function (data) {
  // handle transaction result
});
Webhook
After processing any transaction via our PayPal Button integration, we will call your webhook with all relevant transaction information. You can define your webhook URL within your merchant configuration. Any server-to-server request to modify an existing transaction has to be made with our transactionId. Please refer to our page After The Payment for more information on actions you can make after a payment has been completed.
Within our Payment Button integration, your webhook will always be called asynchronously after completing a transaction. We only try to call your webhook once. If it fails, no additional calls will be performed.
Showcase & more
For a detailed sample, you can visit our PayPal Button showcase. All events and parameters are explained there in detail too.
Updated 8 months ago