
iOS Integration
Version 4 documentationYou’re viewing documentation for Mobile SDK version 4.x.
Version 4 introduces a new architecture and currently supports card payments, Apple Pay, Google Pay, PayPal, PostFinance Pay and Twint.
We are actively working toward full feature parity with version 3.x, with additional payment methods and features planned for upcoming releases.
For full feature coverage, refer to the version 3.x documentation.
SDK integration: Now withtransactionIdTo start using the iOS SDK, make sure your backend can generate a version 2 transactionId via the
/v2/transactionsinit endpoint.See our migration guide if you are migrating from Mobile SDK 3.x and transactions v1:
Integration
Add the SDK to your iOS project as a Swift package using the GitHub repository github.com/datatrans/ios-sdk. In most projects, select all available packages. If you are building an App Clip, include only the packages required for your payment methods and flows. Contact support if you need help choosing the right packages.
Start the SDK with a transactionId obtained from your server-side init call. You can also pass additional options and saved payment methods for faster checkout flows by using the provided SavedPaymentMethod classes. The example below shows the minimum setup required to start a transaction on iOS. For additional initialization options, see the iOS SDK reference.
let transaction = Transaction(transactionId: transactionIdFromBackend)
transaction.delegate = self // you must implement your TransactionDelegate here
transaction.start(presentingController: yourCheckoutViewController)
// 1. Declare a transaction binding
@State private var transaction: Datatrans.Transaction?
// 2. Attach our datatrans modifier with the binding to a root view
var body: some View {
ContentView()
.datatrans(startWithTransaction: $transaction)
}
// 3. Configure a transaction, then assign it to trigger the payment
let trx = Datatrans.Transaction(transactionId: transactionIdFromBackend)
trx.delegate = self
transaction = trxDTTransaction* transaction = [[DTTransaction alloc] initWithTransactionId:transactionIdFromBackend];
transaction.delegate = self; // you must implement your TransactionDelegate here
[transaction startWithPresentingController:yourCheckoutViewController];Info.plist file
To use card scanning in your iOS app, add a camera usage description to Info.plist. This text explains why your app requests camera access. If you omit it, the app can crash when the card scanner is opened.
If you support app-switch payment methods such as PostFinance Pay or Twint, add the required payment app schemes to LSApplicationQueriesSchemes in Info.plist. This lets your app detect and switch to the payment app during checkout.
#CameraUsage
Key    :  Privacy - Camera Usage Description
Value  :  $(PRODUCT_NAME) requires camera access to scan cards.

#PostFinance Pay
Key    :  LSApplicationQueriesSchemes
Value  :  [ "postfinance-epayment" ]

#Twint
Key    :  LSApplicationQueriesSchemes
Value  :  [ "twint-extended", "twint-issuer1", ... , "twint-issuer39" ]
<key>NSCameraUsageDescription</key>
<string>$(PRODUCT_NAME) requires camera access to scan cards.</string>
<key>LSApplicationQueriesSchemes</key>
<array>
<string>postfinance-epayment</string>
<string>twint-extended</string>
<string>twint-issuer1</string>
<string>twint-issuer2</string>
<string>twint-issuer3</string>
<string>twint-issuer4</string>
<string>twint-issuer5</string>
<string>twint-issuer6</string>
<string>twint-issuer7</string>
<string>twint-issuer8</string>
<string>twint-issuer9</string>
<string>twint-issuer10</string>
<string>twint-issuer11</string>
<string>twint-issuer12</string>
<string>twint-issuer13</string>
<string>twint-issuer14</string>
<string>twint-issuer15</string>
<string>twint-issuer16</string>
<string>twint-issuer17</string>
<string>twint-issuer18</string>
<string>twint-issuer19</string>
<string>twint-issuer20</string>
<string>twint-issuer21</string>
<string>twint-issuer22</string>
<string>twint-issuer23</string>
<string>twint-issuer24</string>
<string>twint-issuer25</string>
<string>twint-issuer26</string>
<string>twint-issuer27</string>
<string>twint-issuer28</string>
<string>twint-issuer29</string>
<string>twint-issuer30</string>
<string>twint-issuer31</string>
<string>twint-issuer32</string>
<string>twint-issuer33</string>
<string>twint-issuer34</string>
<string>twint-issuer35</string>
<string>twint-issuer36</string>
<string>twint-issuer37</string>
<string>twint-issuer38</string>
<string>twint-issuer39</string>
</array>Twint requires you to define 40 schemes to support app switches to their many apps. If you have limited space due to other integrations (iOS has a limit of 50 schemes), use the SDK option twintMaxIssuerNumber. Set this value to match your highest twint-issuerXY scheme. For example, if Info.plist contains up to twint-issuer35, set the SDK option twintMaxIssuerNumber to 35. Make sure the twint-extended scheme is always included in your Info.plist file.
If possible, always make room for 40 Twint schemes!Whenever possible, allocate the full 40 Twint schemes within
LSApplicationQueriesSchemes. This ensures the best possible user experience, allowing for seamless app switching during payments.While the
twintMaxIssuerNumberoption can be used as a workaround if you face scheme limitations, it negatively impacts the user experience. Using this option prevents smooth automatic app switching during the Twint payment process.
Additional requirements for iOS
Credit and debit cards
To enable native 3-D Secure flows for credit and debit card transactions, include ThreeDS_SDK when linking our SDK through Swift Package Manager. Then set TransactionOptions.appCallbackURL to a universal link and configure an associated domain for your app so users can return to it seamlessly after authentication. For setup details, see Apple’s documentation on how to set up an associated domain.
Apple Pay
To enable Apple Pay in your iOS project, create an Apple merchant identifier, upload the certificate in your Datatrans merchant settings, and enable the Apple Pay capability in Xcode. For the full setup steps, see Apple Pay via Mobile SDK.
PayPal
To correctly process PayPal transactions in your iOS project, make sure to include PayPal’s PPRiskMagnes component in Swift Package Manager when you link our SDK. Also configure the app callback scheme as described in the next section so the user can return to your app after authentication.
App-switch payment methods (Twint, PostFinance Pay, PayPal)
If you process Twint, PostFinance Pay, or PayPal, set your app callback scheme in the transaction options. This is required so the payment app can return users to your app.
options.appCallbackScheme = "your_scheme" // PayPal, PostFinance Pay, Twint
options.appCallbackURL = "https://yourdomain.com/app" // Card payments
options.appCallbackScheme = @"your_scheme"; // PayPal, PostFinance Pay, Twint
options.appCallbackURL = @"https://yourdomain.com/app"; // Card paymentsAfter the transaction
After the transaction has been completed, your delegate's transactionDidFinish method will be invoked with transaction details, including the payment method and the token if one was created. If the transaction failed, transactionDidFail is invoked with error code and message. If the transaction was canceled by the user, transactionDidCancel will be invoked.
We also send the transaction result to your configured webhook. See Webhook for details.
Styling the SDK
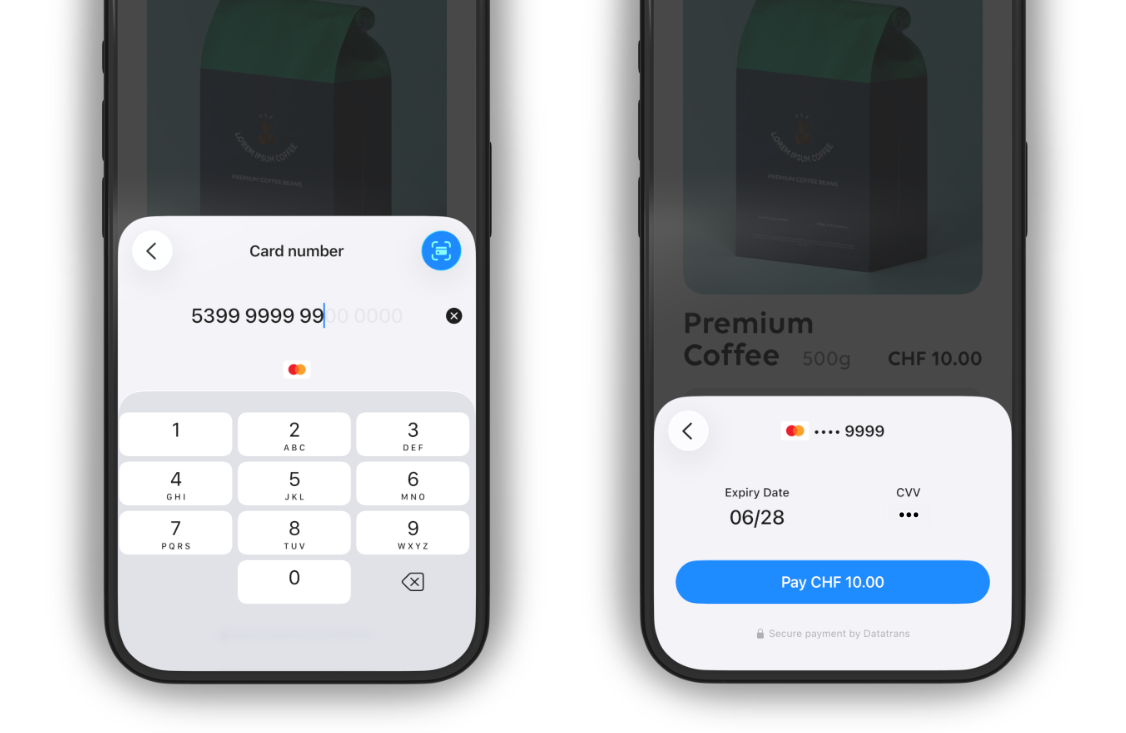
You can specify an accent color that the SDK uses to highlight certain key interface elements, such as the card scan button and the Pay button.
transaction.theme.accentColor = UIColor.redtransaction.theme.accentColor = UIColor.redColor;By default, the SDK uses a blue accent color, as shown below.
Updated 2 months ago